as much as i enjoy being outside, it's been hotter than hot with an extra dose of humidity here lately, so i've been hiding in my air conditioned house doing a lot of sewing!
one recent project was this super easy receiving blanket.
to make it i used:
1 yd flannel fabric
1 yd cotton fabric
pins
my handy-dandy sewing machine, loaded with coordinating thread
scissors
a needle and a bit of extra thread
1 yd flannel fabric
1 yd cotton fabric
pins
my handy-dandy sewing machine, loaded with coordinating thread
scissors
a needle and a bit of extra thread
after cutting the cotton fabric to a 30" x 36" rectangle,
i spread the flannel fabric out and smoothed it out.
(you only need a yard of flannel for this project, i just had this big piece of flannel on hand, so i just had a lot more to cut away after pinning.)
i spread the flannel fabric out and smoothed it out.
(you only need a yard of flannel for this project, i just had this big piece of flannel on hand, so i just had a lot more to cut away after pinning.)
then my dog got on, so i shoved him off to one corner.
with the dog off to the side, i laid the cotton fabric down, wrong side facing up, on top of the flannel.
i then pinned the fabrics together, all the way around. the more pins, the less movement, but i'm always lazy and only pinned every 4-5" or so.
then i cut off the extra flannel fabric, leaving about 1/4" of flannel all the way around.
you could cut it all even at this point, so both pieces are 30" x 36", but i'm always afraid of the flannel fabric pulling while i sew them together and having to start over, so i like having extra to work with... just in case i end up pulling out all my seams and starting over. it's easier to line up fabrics when they're not exactly the same size.
....this fear is based on a bad, beginner's experience 4 yrs ago. apparently, i'm still not over it, since i make all my blankets using this extra step. =)
but anywho... back to the project....
i then took it to the machine and sewed the edges, using a 1/4" seam, almost all the way around.
you want to leave about a 5" gap in your stitching. (or whatever size will be big enough to put your hand through and turn it all inside out later.) be sure to reinforce your stitching in the begining and when you get to the end. that way, your blanket doesn't start to unravel while you turn it inside out.
NOW is when i cut the extra flannel off, trim up my edges and cut the corners at an angle.
(this helps the corners look "sharp" when it's turned inside out.)
(this helps the corners look "sharp" when it's turned inside out.)
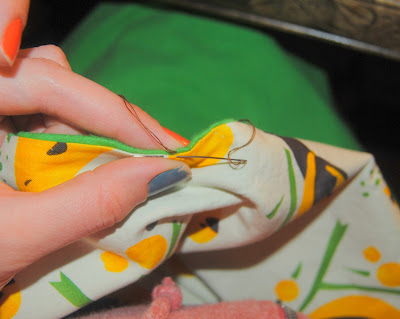
after turning it inside out, i poke my finger into each corner to make them as pointy as possible. then i grab my good, old fashioned needle and thread and stitch that 5" gap closed.
next up, pick a stitch to use all the way around your blanket. i usually just use a straight stitch, but i was feeling fancy this time and used this curvy one instead. =)
easy peasy!


